
A narrow walk-in pantry is a paradox. It is a whole room for food, yet food still gets lost.
The reason is depth. In a narrow pantry, shelves are often deep. Items get pushed to the back. Then you buy a second jar of something you already own, because you cannot see the first one.
The fix is not more shelves. It is zones, visibility, and a clear rule for what goes where.
So start by emptying the pantry completely. Yes, completely. Then put back only what you actually use, in zones, in containers you can see through.

Zones: the system that stops the mess returning
Divide a narrow pantry into zones by use, not by food type alone. A typical narrow pantry works well with five zones.
First, everyday cooking: oils, spices, tinned tomatoes, pasta, and rice. Second, breakfast: cereal, oats, coffee, tea, and spreads.

Third, baking: flour, sugar, baking powder, and chocolate. Fourth, snacks and lunchbox items: crisps, crackers, dried fruit, and lunch containers.
Fifth, backstock: duplicates, bulk buys, and rarely used items. Where should each zone go? Put everyday cooking at eye level, within arm’s reach of the door. Put breakfast just below or above it. Put baking on a higher shelf you reach a few times a week. Put snacks where children or housemates can reach them without moving cooking items.

Put backstock on the highest shelf, or the deepest part of a shelf. It is there when you need it, but it never gets in the way.
Label each zone on the shelf edge with a small label or a piece of tape, until the system becomes habit. If an item does not fit a zone, it probably does not belong in the pantry. Put it in the kitchen, the fridge, or the bin.
Containers: clear, uniform and sized for narrow shelves
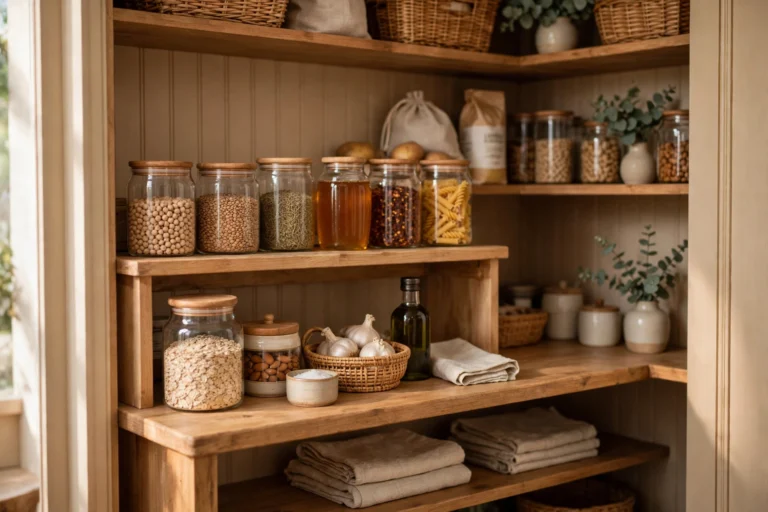
What containers should you choose? Clear, uniform, and sized for narrow shelves. Clear containers are the single best investment for a narrow pantry. They let you see how much is left, without opening every jar.
Use uniform containers for dry goods: flour, sugar, rice, pasta, oats, and cereal. Choose square or rectangular shapes, not round ones. Squares use shelf space well, and they do not roll.

Choose containers that fit your shelf depth, with at least 2 inches to spare at the front. That gap lets you pull them out without catching the shelf above. Decant only what you use regularly. Decanting everything, including rarely used spices, wastes time and containers. For small items — spice jars, sauce packets, baking decorations — use a small bin per category. Label it on the front, so a whole bin can be pulled out like a drawer. Avoid oversized baskets in a narrow pantry. Clear bins with handles are more practical, and they stack safely.

Door storage and the back of the shelf problem
The pantry door is wasted space in most homes. In a narrow pantry, that space is valuable. An over-door rack, or a set of door-mounted baskets, holds spices, oils, sauces, and small jars at eye level. If your pantry door is a standard interior door, check that the rack does not stop the door closing. Also check that it does not damage the hinges with weight.
Keep door storage to light items: spices, packets, and small bottles. Not full jars of pasta sauce. Now, what about deep shelves? Use a pull-out bin or a lazy Susan on each shelf. A turntable for oils and sauces means you spin to find, not reach and knock over.

For the very back of a deep shelf, put backstock only. Then put a small label on the front edge saying what is behind — “backstock: tinned tomatoes, 6” — so you do not need to pull everything out to check.
In a narrow pantry, a shelf that is too deep is worse than a shelf that is too shallow. If your shelves are more than 14 inches deep, add a riser at the back, so back items sit higher and remain visible.
Labelling that actually gets used
Labelling fails when it is too pretty to update, or too vague to help. Use a label maker, or simple masking tape and a marker. Write the item name and the expiry month — “Rice — Jan 2027” — not just “Rice.” That date is the part that prevents waste.
Put the label on the front of the container, at the same height on every container. For bins, label the bin, not the items inside. And keep a small “use first” bin at the front of the everyday zone, for items nearing expiry. When you buy a replacement, move the older item to the front and put the new item behind it. That is the shopkeeper’s rule: first in, first out. That one habit prevents most pantry waste.

Do not label with a system only you understand. If a housemate or partner cannot find pasta without asking, the system is not finished.
How to do it in one weekend
How do you organize a narrow pantry in one weekend? Take it step by step, and measure before you buy.
On Saturday morning, empty the pantry onto a table. Check expiry dates. Check the USDA FoodKeeper storage times for how long pantry staples keep. Discard anything expired, stale, or unidentifiable. Wipe the shelves. Measure shelf width, depth, and height, and note the door width. On Saturday afternoon, buy or order containers and bins to fit those measurements. Do not buy before measuring. A container that is 1 inch too tall for a shelf is useless, no matter how nice it looks.
On Sunday, set up zones, decant dry goods, label containers, and put backstock on the highest shelf. Keep a shopping list for the week based on what you already have, not what you think you have. The most common mistake is organizing around containers you already own that do not fit, rather than measuring first and buying to fit. A narrow pantry organized with the right size containers feels twice as large as the same pantry with random jars and baskets.

What it actually costs
What does a DIY narrow pantry organization actually cost? If you do not replace shelves, here is a realistic range.
Clear containers for dry goods, 8–12, $50–$110. Small category bins, 4–6, $30–$60. Lazy Susans or turntables, 2–3, $30–$60.

Door rack or door baskets, $25–$50. Shelf risers, 2–3, $25–$50. Labels and a marker, $10–$20. A small step stool, if shelves are high, $30–$60.
That totals roughly $200–$410. If you also add pull-out shelf baskets or a new shelf, add $80–$200. Have that work done by a competent DIYer. Pull-outs need accurate measuring and fixing into studs or solid shelf supports, not just plasterboard.

If your budget is under $150, buy clear containers for the five most-used dry goods, two turntables, and labels first. Those three change visibility immediately. Do not buy a full matching container set before you know which dry goods you actually store. A set of 20 containers for a household that uses five dry goods is waste, not organization.

What to avoid
What should you avoid? Start with deep, dark baskets that hide food. Avoid decanting everything into matching jars if you will not maintain it. A half-maintained system is worse than a simple one, because it looks organized while food still expires unseen.
Avoid putting heavy items on high shelves. They are hard to lift, and dangerous if they fall. Keep heavy items low, where you can lift them safely.

Avoid storing food directly on the floor, where it attracts pests and gets damp. Use a low shelf or a sealed bin instead. Avoid overfilling shelves so tightly that pulling one item knocks over three others. Leave a finger’s width between containers. And avoid organizing by colour or by brand. Organize by use, label clearly, and keep the front of every shelf visible. That is the system that lasts.

See more: Kitchen, Ideas by Room, 16 Smart DIY Walk-In Pantry Ideas, 20 Organized Stylish Pantry Organization Ideas, and 15 Minimalist Kitchen Ideas.
FAQ
How do I organise a narrow walk-in pantry?
Use zones by use, clear uniform containers sized to your shelf depth, door storage for light items, and turntables for deep shelves. Label everything with name and expiry, and put backstock on the highest shelf.
What containers are best for a small pantry?
Clear, square, stackable containers with handles, sized to leave 2 inches at the front of the shelf. Use small bins per category for spices and packets, and pull the whole bin out like a drawer.
How do I stop food getting lost at the back of a pantry?
Put backstock only at the back, use risers so back items sit higher, use turntables for sauces and oils, and label the front edge with what is behind. Follow first in, first out when you restock.